Podepnij Aidlab do projektu Unity na Androida. Przedstawiamy szablon dla studiów gier i twórców biofeedbacku, którzy chcą eksperymentować z oddechem w immersyjnych doświadczeniach.
In this tutorial, you’ll connect your Android phone or tablet to Aidlab using Unity. If you aren’t familiar with Unity, it’s a cross-platform game engine with a powerful GUI editor and robust asset store.
Note: This tutorial assumes you are familiar with Unity. If you are not, we encourage you to read Getting Started with Unity at learn.unity.com.
By the time you’re finished, your app will present a simple cube that you’ll be able to control with your breathing.
1. Let's start by creating a NEW, 2D Unity project:
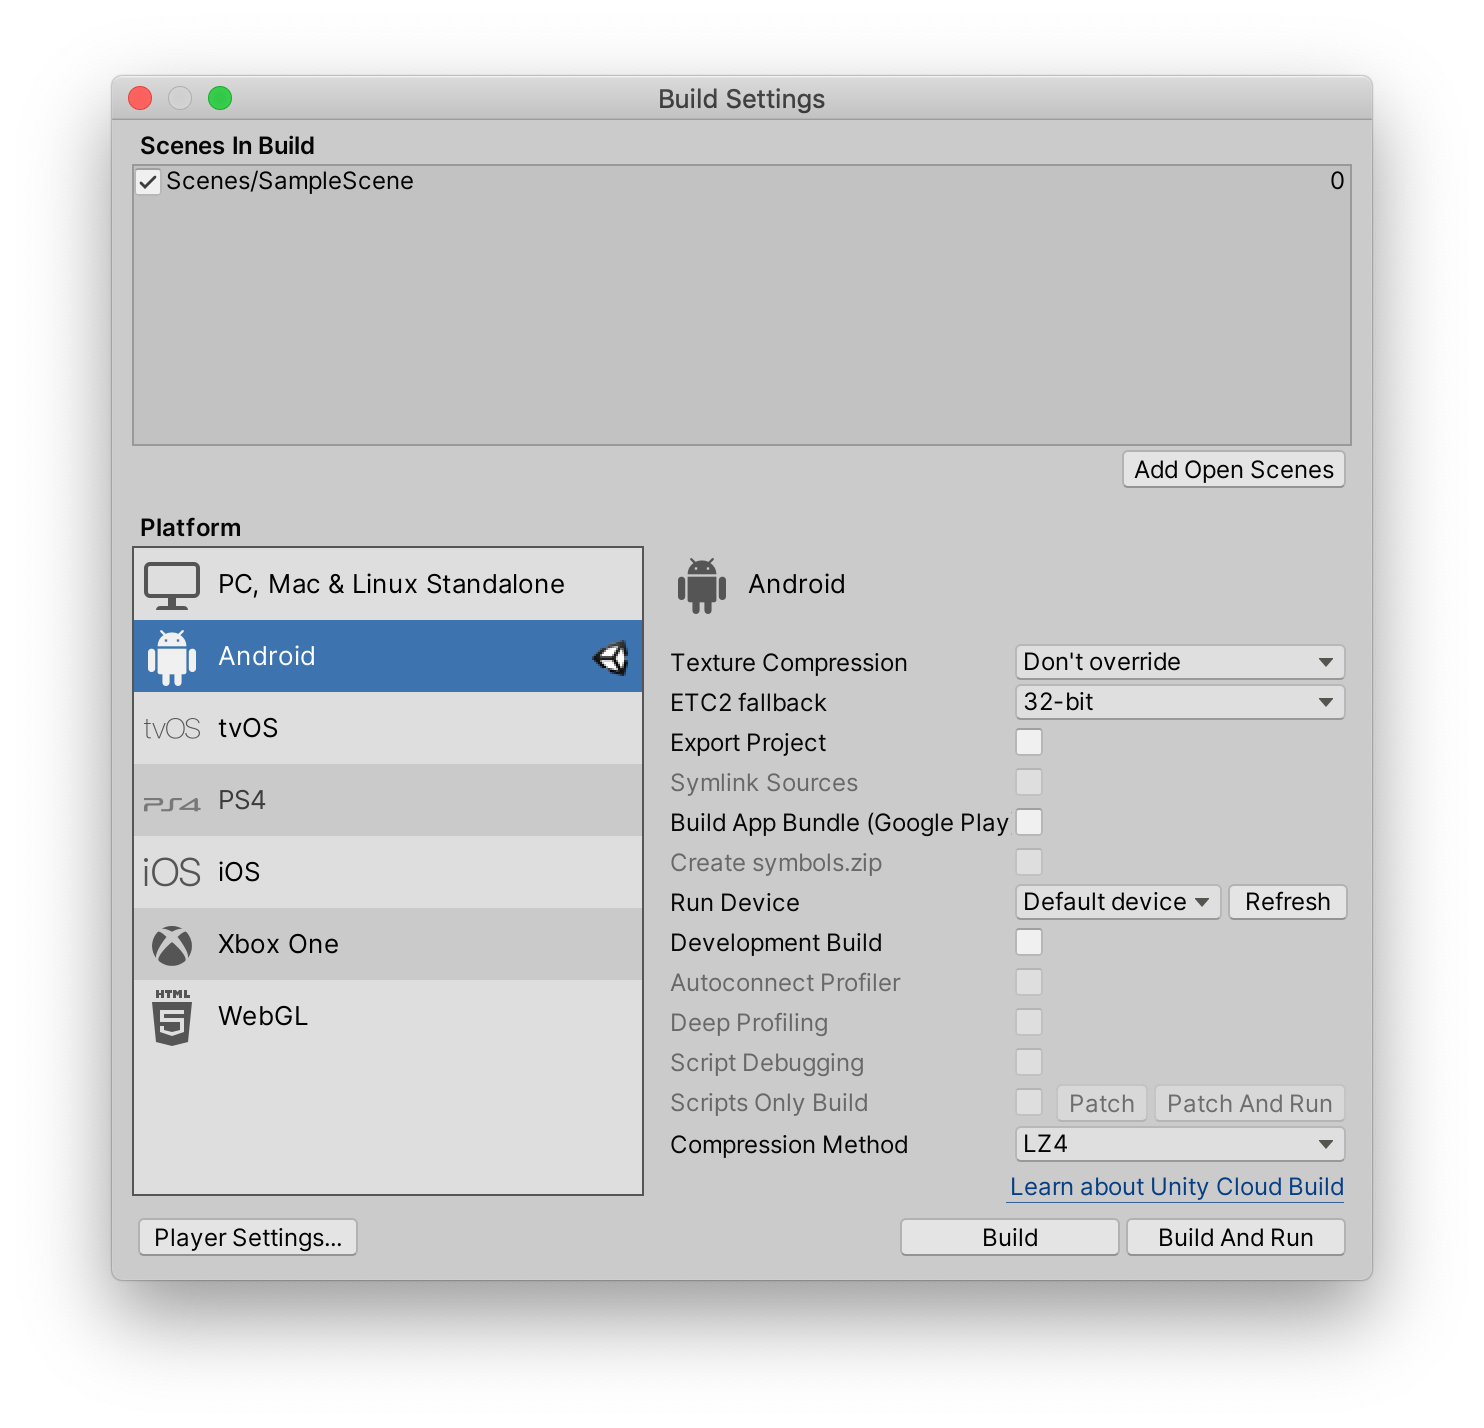
2. Create an empty scene, then add it to your build settings. Also set Android as the desired build platform:
3. Download the Aidlab SDK, and import it to your project (Assets -> Import Package -> Custom Package...).
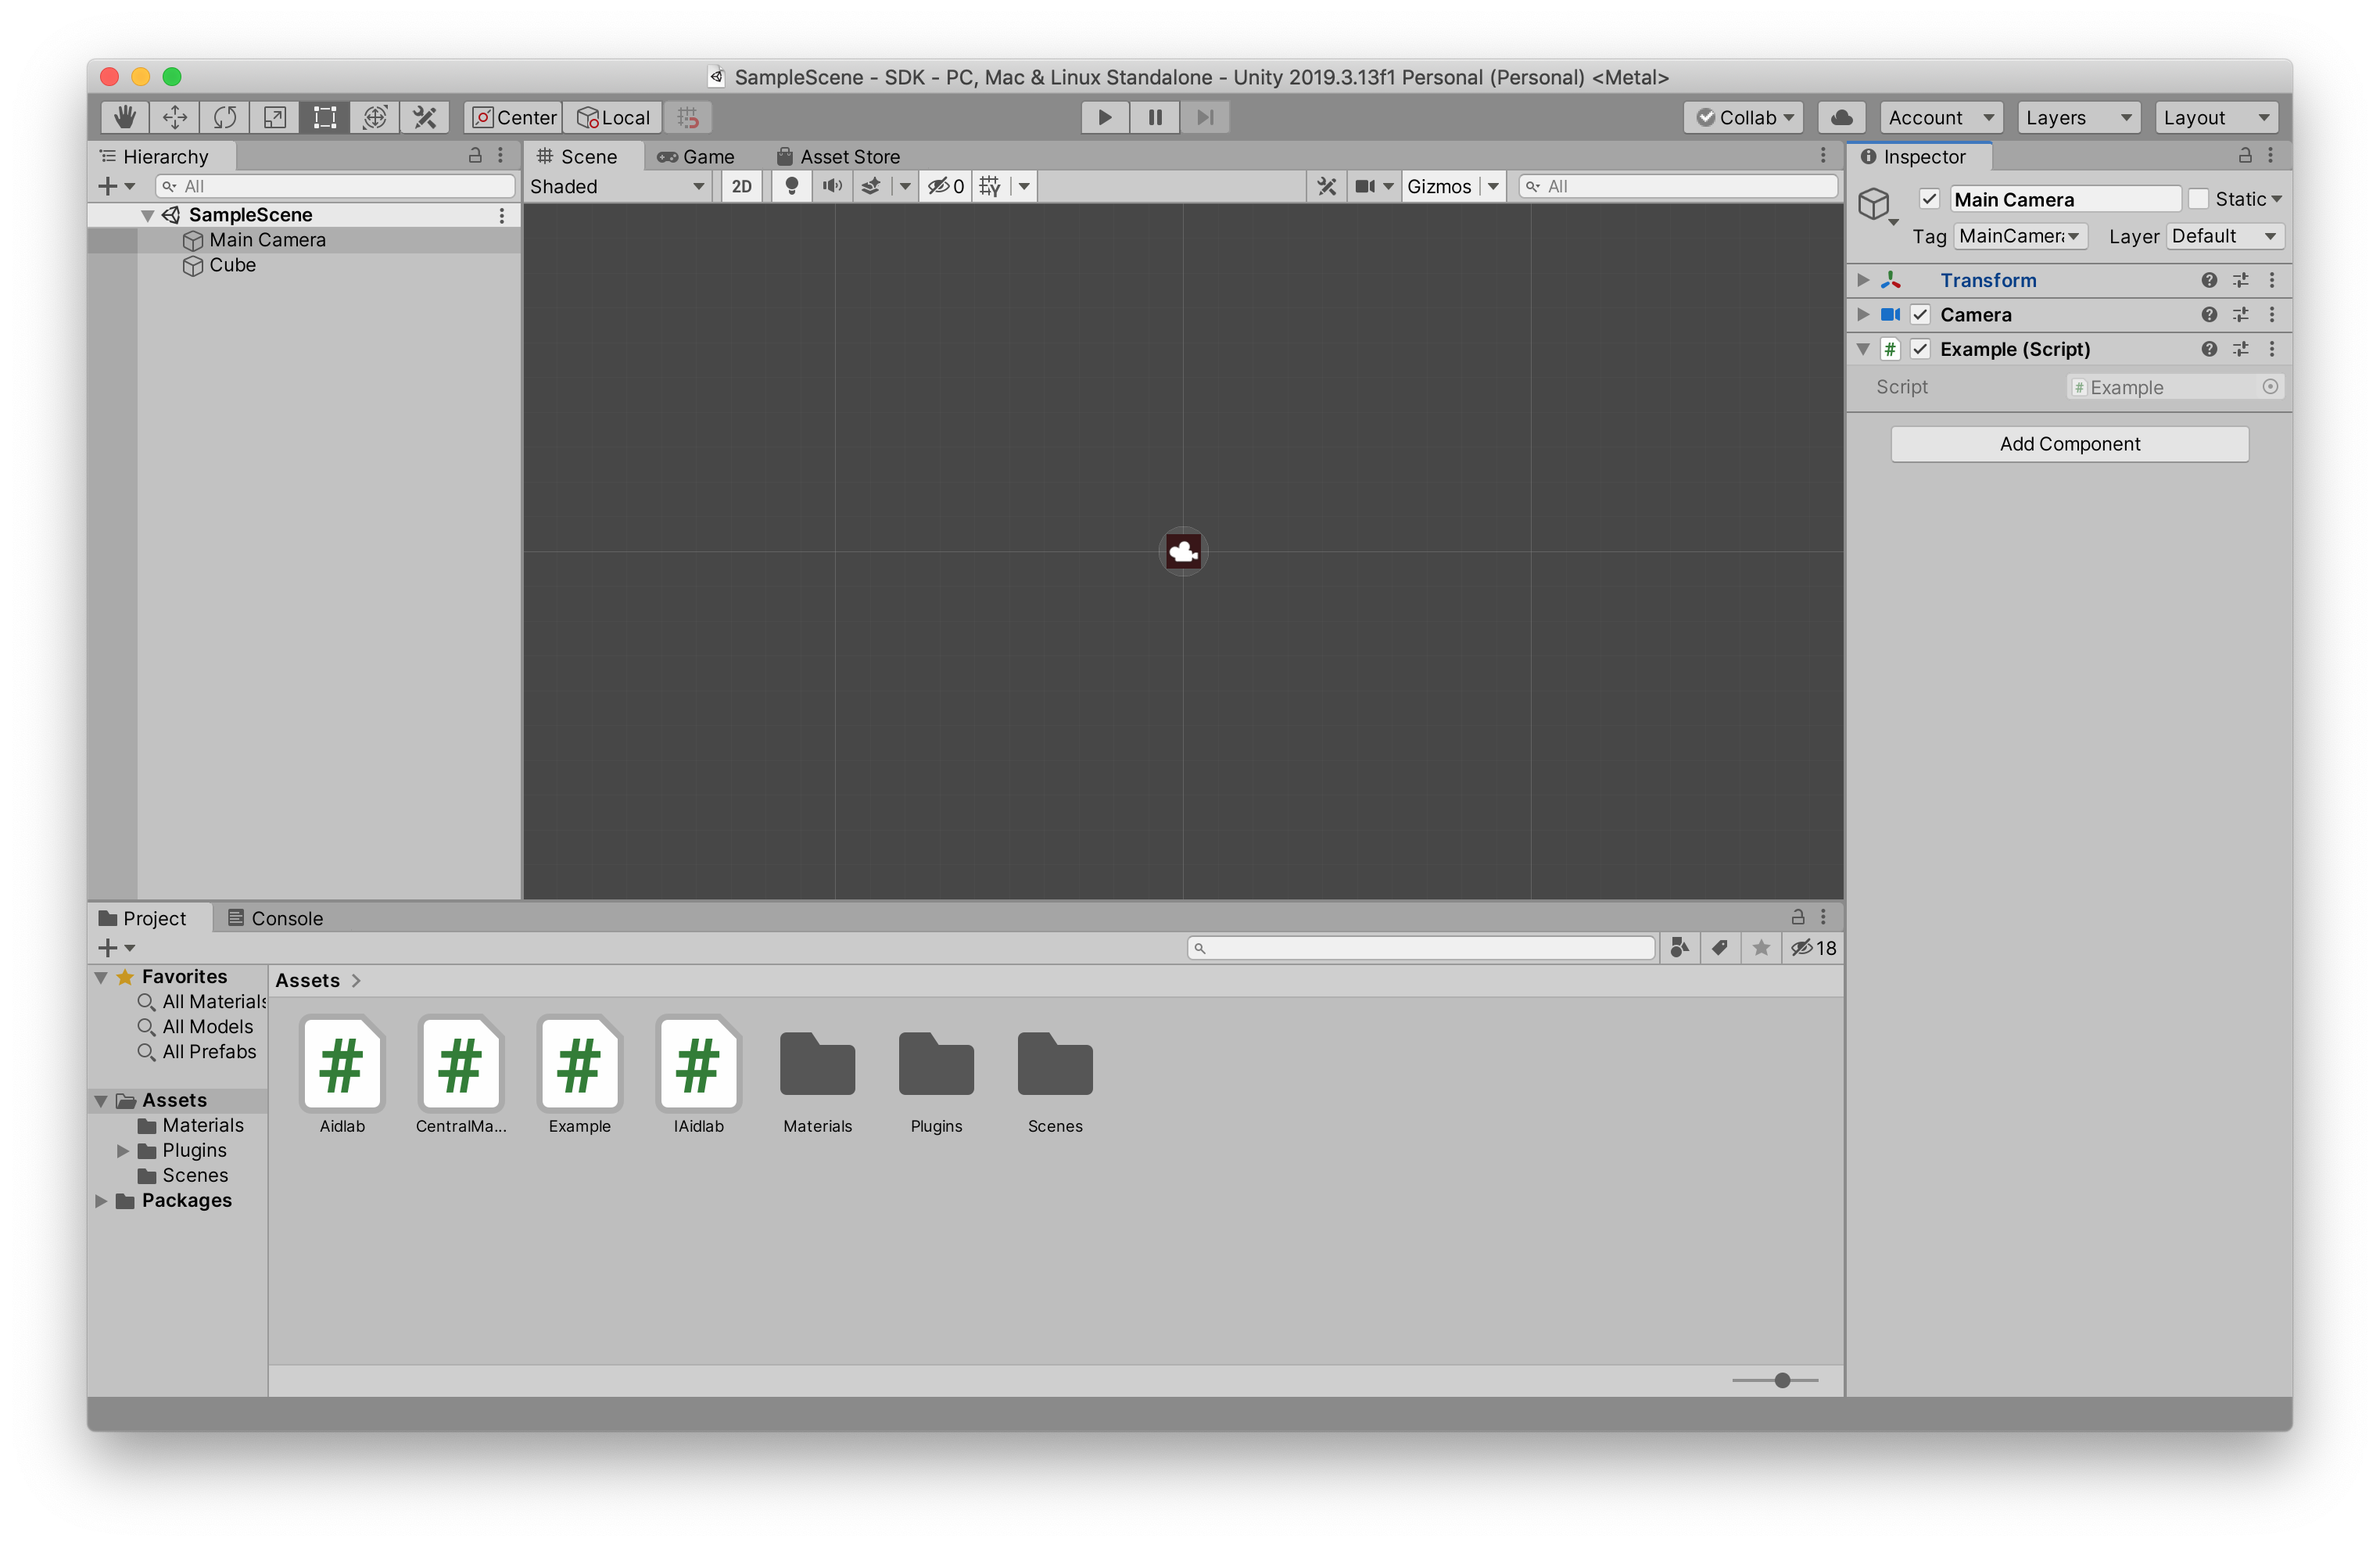
4. Create a Cube object in the Unity editor, and attach the Example.cs to the Main Camera object. Now, the scene should look as follows:
5. A very important step is to set the minimum Android SDK version to API 28 or newer:

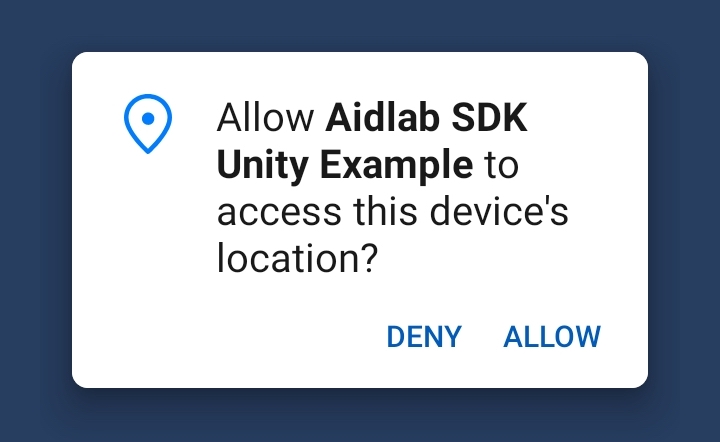
6. Plug your Android device to your computer, and Build and Run your project. Wait a few seconds and allow the Bluetooth permissions requested by the app:
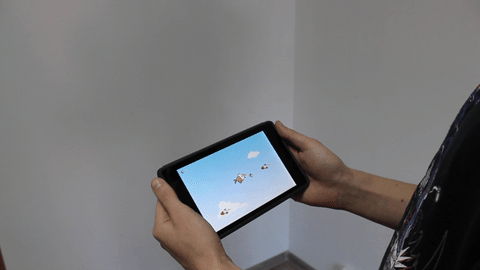
7. Turn Aidlab on and wear it. It should automatically pair with your Android device. Now you can control your Cube only by controlling your breathing pattern.
At this moment you should start modifying Example.cs and your project as you like.
How it works
Our main Example class (Example.cs) receives events from Aidlab directly. We achieved that by implementing the AidlabDelegate interface. Then, we passed a reference of Example straight to the constructor of the Aidlab class here:
void Start() {

	enableBluetooth();
	requestBluetoothPermissions();
	aidlab = new Aidlab(this);
}
Aidlab is a core class of the Aidlab Android bridge for Unity. It is responsible for connecting to your Aidlab device, and for listening to any upcoming events from it. You don't have to modify that class.
There are two necessary actions you need to perform in order to pair with Aidlab over Bluetooth. Android requires Bluetooth permissions, and the Bluetooth adapter needs to be enabled. See the definitions of requestBluetoothPermissions() and enableBluetooth() if you are curious how they work.
From the AidlabDelegate interface you can look up events that are coming from Aidlab. Aidlab SDK allows you to receive several events like motion activity, respiration rate, skin temperature, ECG, just to name a few.
In this tutorial we are mostly interested in raw respiration signal, representing the ventilation level:
public void didReceiveRespiration(IAidlab aidlab, UInt64 timestamp, float value)
Respiration is a breathing waveform sample from the impedance respiration sensor, so we scale it and clamp it to reasonable values for this visual effect:
private float normalizeRespiration(float sample) {

    return Mathf.Clamp(sample * 10, -4, 4);
}
We clamp the value to [-4, 4] so our Cube will not leave the main camera's viewport. At each update we modify the Cube object to follow chest movement:
void Update() {

        var cube = GameObject.Find("Cube");
        Vector3 position = cube.transform.position;
        position.y = normalizeRespiration(currentRespirationSample);
        cube.transform.position = position;
}
That's it. Just imagine what amazing effects you can now achieve:
Dealing with Unity and Aidlab using Aidlab SDK at the same time is an easy task, but let us know in case of any troubles.